CHeKT Bridge Relay Configuration and Control
Overview
With the release of our Version 2 Hardware Model, the CHeKT Solution incorporated the ability to interface with a myriad of external devices by way of a simple relay output. Once configured, the relay can grant operators and end users the ability to create a "real-world" impact on site from their station, using our intuitive Monitoring Portal or mobile app. Trigger gate openings, energize flood lights, or even trip an access control input with the click of a mouse or press of a touchscreen. Read on to find out how easy it is to grant a monitoring operator or end user control of their site.

Hardware Compatibility:
The relay function is only available with CKB304 V2 and CKB312 hardware. Not sure which version you have? See Which Hardware Version is My Bridge
 ⚠️ Important: The CKB304 V2 Relay is only rated at 100mA. Please avoid damage to the unit by not exceeding this power draw.
Hardware Connection
Relay Output Capabilities
The CKB304 V2 and CKB312 have relay outputs that can be energized from:
- Dealer Portal
- Monitoring Portal
- End-User App
Terminal Location
Hardware Model | Terminal |
|---|---|
CKB304 V2 | |
CKB312 |
Understanding Relay States
As with most security hardware: NC (Normally Closed) Terminal
- Continuity exists between NC and C terminals in a non-energized state
- No continuity during an energized state
NO (Normally Open) Terminal
- No continuity between NO and C pin when the relay isn't energized
- Continuity exists when the relay is energized
Circuit Independence
The relay circuit is independent from Alarm Inputs and Arming Input.
Portal Configuration
The relay output is not a premium function and will be available to anyone installing a CKB304 V2 or newer models. Always verify that your central station has a plan in place to utilize the relay for your desired function—additional CS fees may apply.
Step 1: Access Relay Configuration
- After registering an applicable Bridge on an up-to-date software build, users will immediately notice the (currently disabled) Relay listed in the Device List in the Dealer Portal
- Mouse over the Relay to see the familiar configuration gear and map location button (identical to those of the IP camera in the device list)
- Click to open the configuration menu
Step 2: Configure Basic Settings
In the relay configuration menu, you'll find these options:
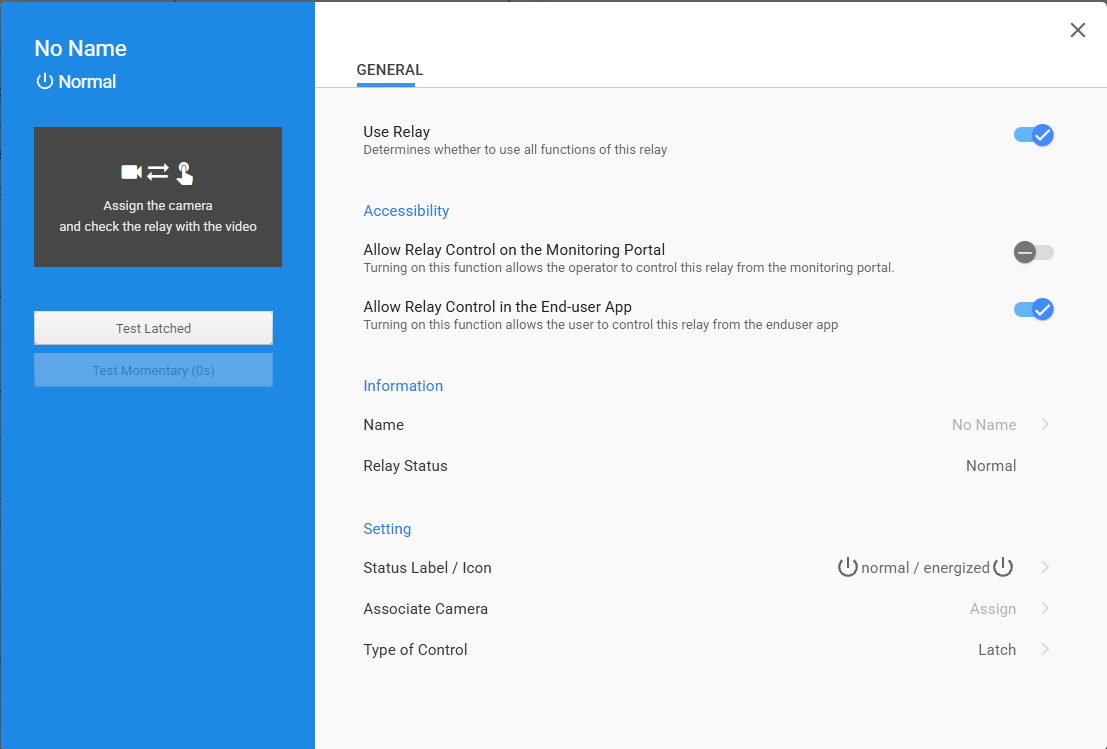
- Use Relaytoggle button - Enables/Disables the relay function
- Allow Relay Control in Monitoring Portaltoggle button - Allows/Disallows monitoring personnel to manually engage the relay with software toggle and see the relay on the Monitoring Map
- Allow Relay Control in End-User Portaltoggle button - Allows/Disallows end users to toggle the relay from the CHeKT.com mobile application
- Name of Relay- Customize the relay name
- Current Relay Status- Shows whether the relay is in "Normal" or "Energized" state
Step 3: Set Status Labels and Icons
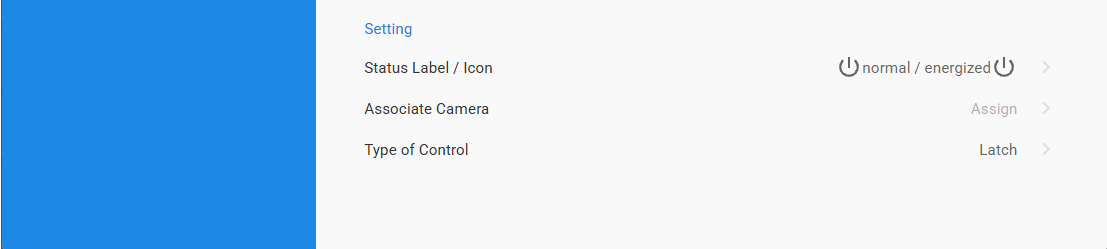
Click Status Label/Icon to open labeling options:
Custom Labels for Relay States
- Manual: Create descriptive labels such as "Pump On," "Pump Off," "Gate Secure," "Gate Ajar," etc. These labels will be visible in both the Monitoring and Dealer interfaces
Custom Icons
- Select custom images to overlay on the relay button in the software
- Various icon options are available to match your use case
Step 4: Associate a Camera (Optional)
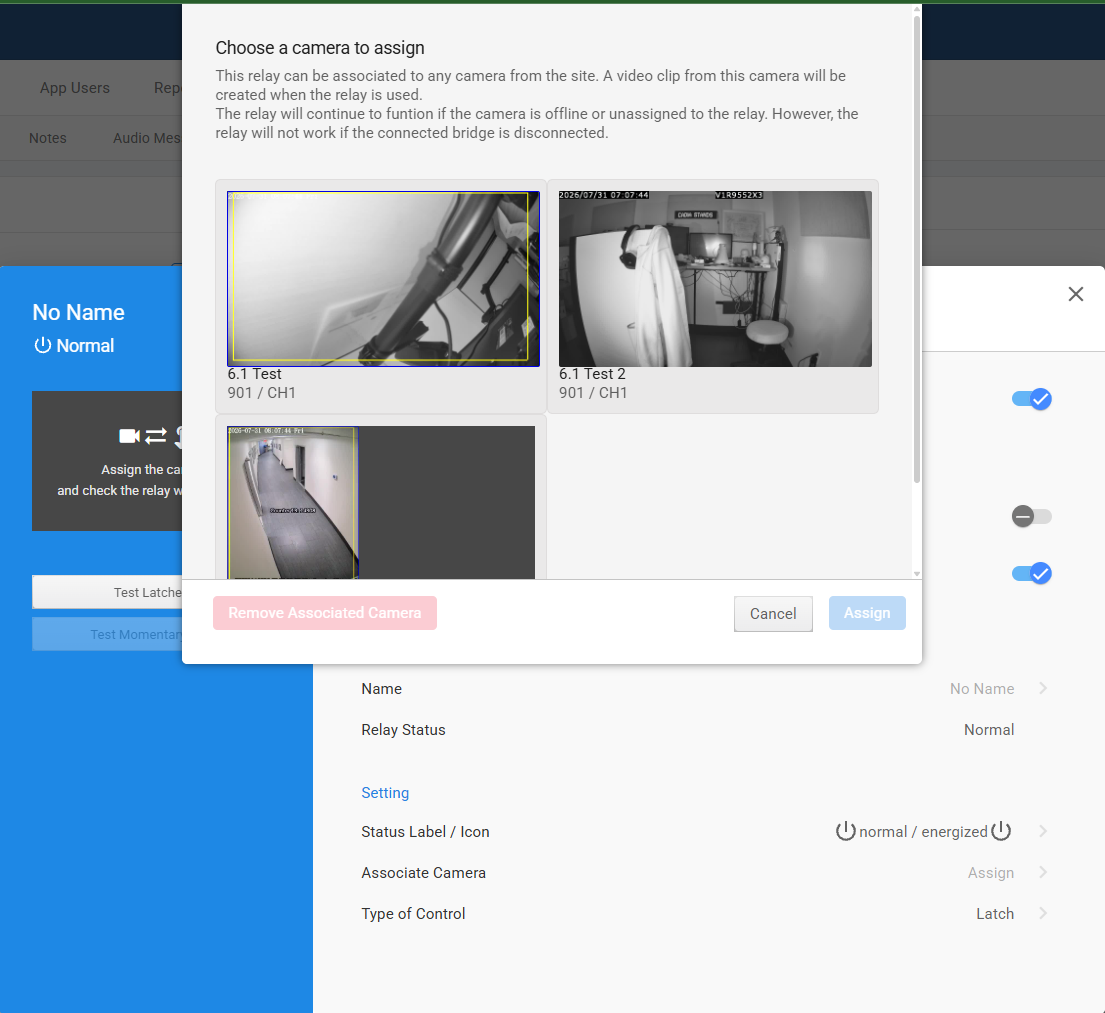
Click Associate Camera to open the camera assignment window:
- Select from already connected cameras on that Bridge to associate a camera stream with the relay
- When the relay changes states, a snapshot event will be created from that camera stream
- Select the camera (only 1 of 4 possible shown) and click "assign"
Step 5: Configure Type of Control
Click Type of Control to configure relay state change specifics:
Latch Mode
- Click the checkbox to enable
- When energized, the state will maintain that status until:
- Canceled by a portal user, OR
- Six hours have passed
Momentary Mode
- Use the slider to set the number of seconds a momentary trigger will keep the relay state energized
Testing
- Test either relay function directly from this screen while configuring
- The assigned camera thumbnail will display in the preview box at the top
Automated Control
- Authorized users can now set the relay to change state automatically when the Monitoring Portal is launched
- This function is great for engaging a spotlight or starting an automated voice sequence
- Select the desired automatic function and check the box to enable
Monitoring Portal
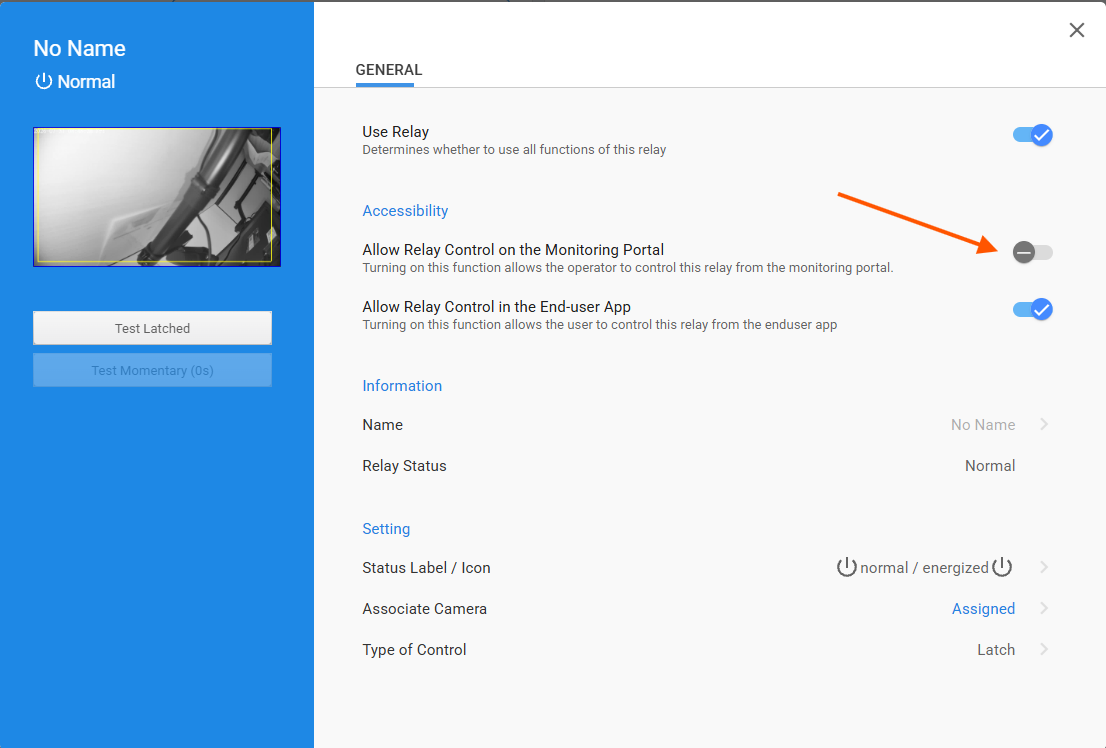
Accessing the Relay
- Verify you have enabled the relay toggle in General tab Monitoring Portal configuration
- Choose your custom images for the button that operators will see (optional)
Launching the Monitoring Portal
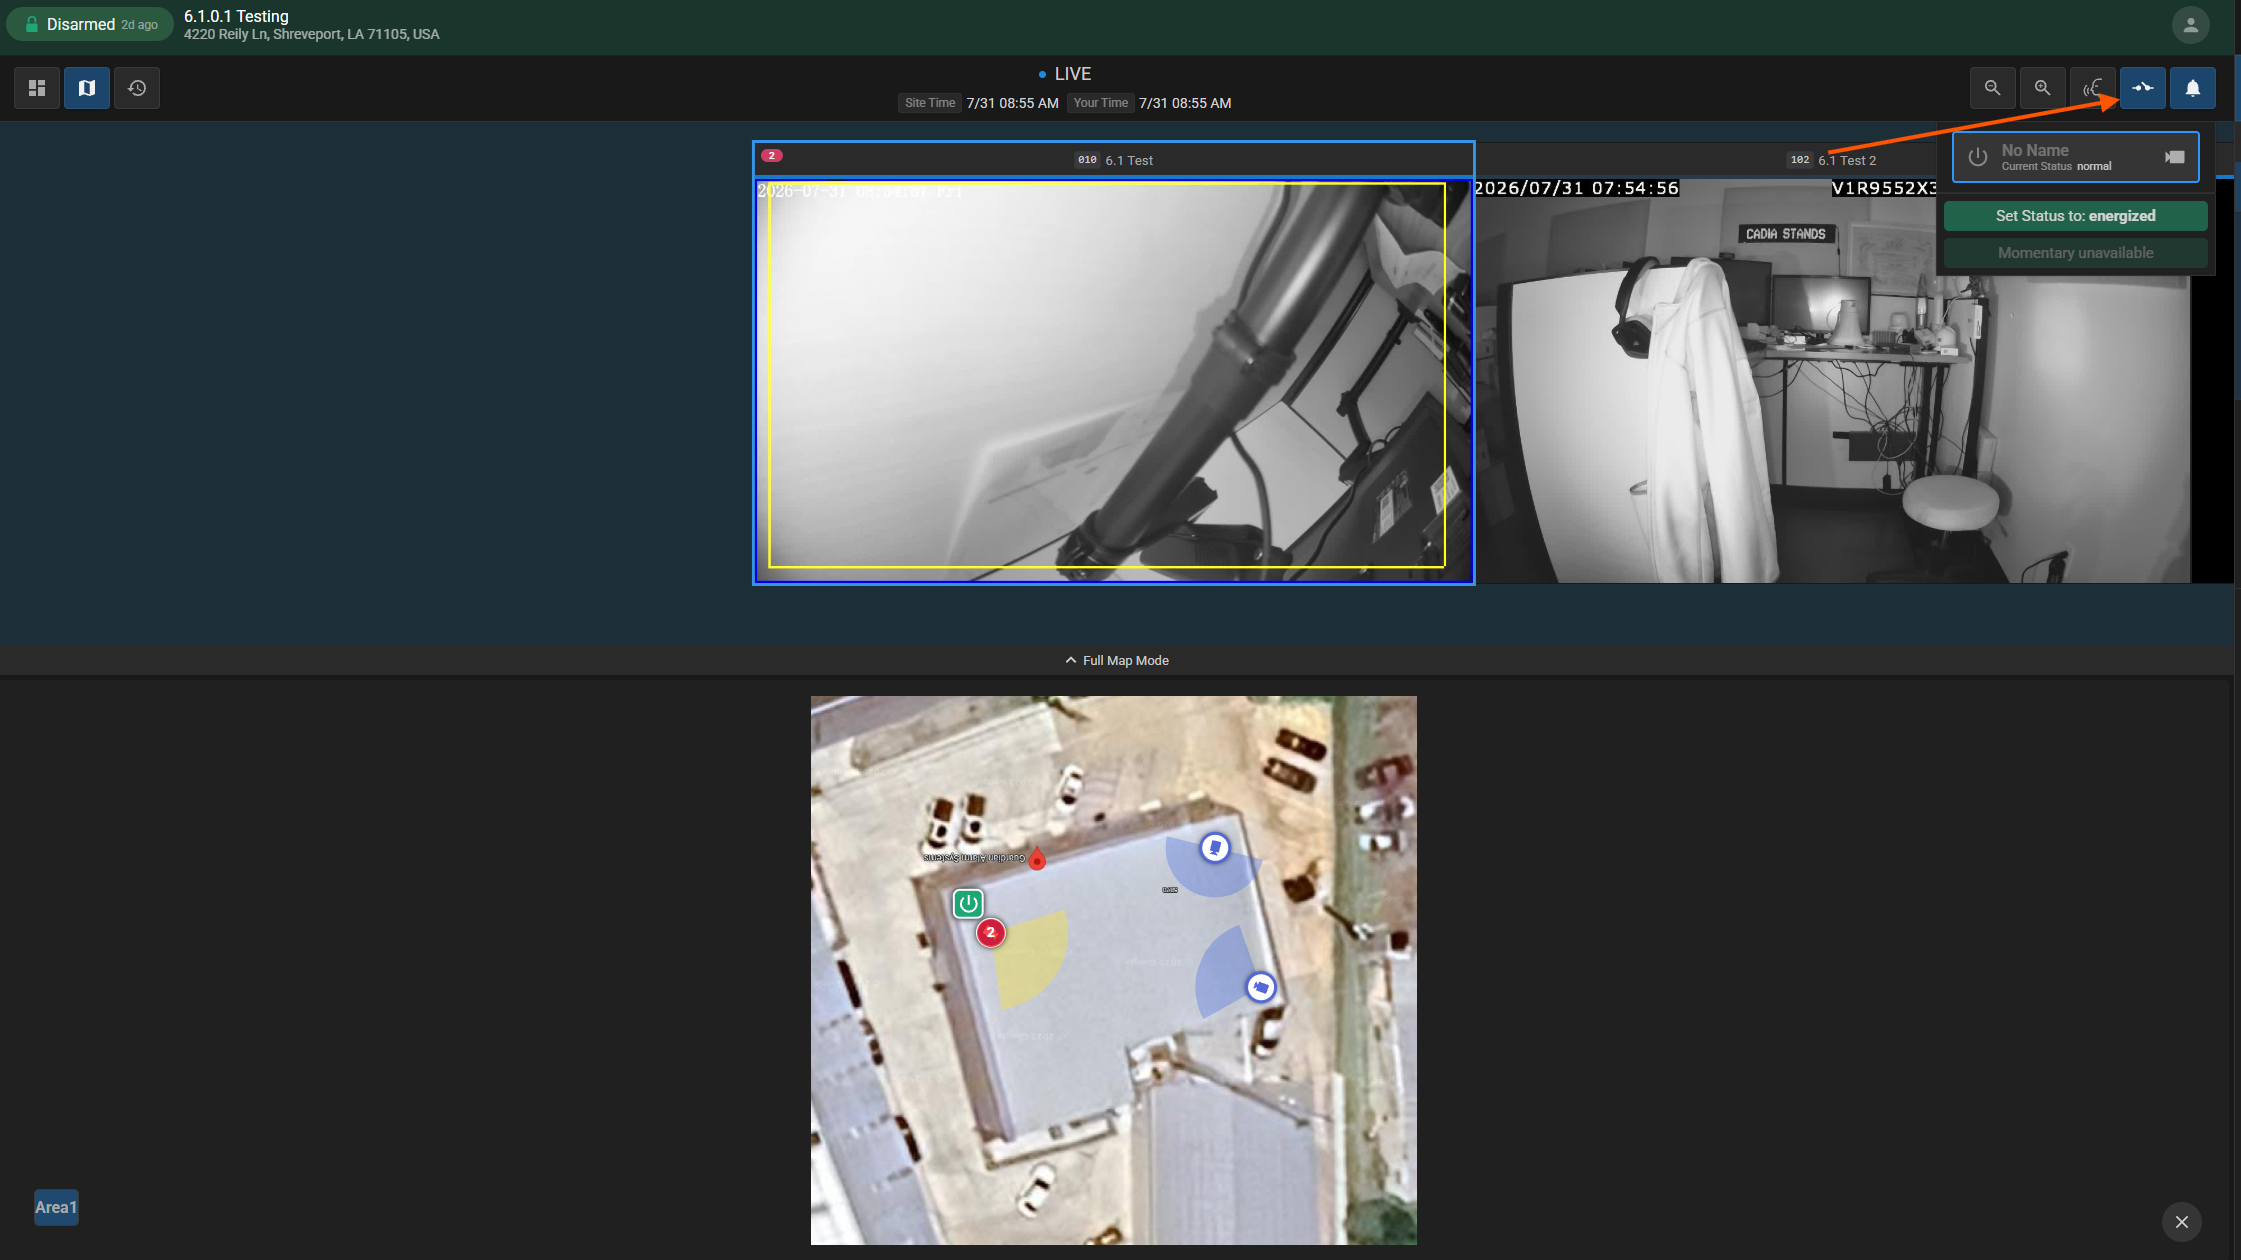
- You will immediately notice a "Relay" button at the top right near the event toggle
- Your relay will show on the map just like the cameras do
Operating the Relay
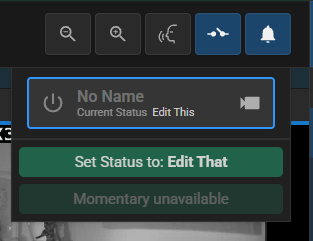
- Click on the Relay option at the top right to open the relay control panel
- You will see the status of the relay using your custom label (e.g., "Door" showing "Closed" when the relay is in the normal state)
- Click on the status to open activation buttons:
- Top Button- Activates a latch (maintains state until manually canceled or 6 hours pass)
- Bottom Button- Activates a momentary trigger (energizes for the configured duration)
With the full menu expanded, you can activate either a latch or momentary function. The status label will update accordingly (e.g., "Set to Open" instead of "Energized").
Summary
The CHeKT Bridge Relay provides a flexible, easy-to-configure solution for remote device control across multiple platforms. Whether managing gates, lights, or access control systems, the relay can be tailored to your specific operational needs with intuitive controls for monitoring personnel and end users alike.