CHeKT PTZ Configurations
Creating PTZ Types
These functions are found in the PTZs web Interface in the "Live Video" selection
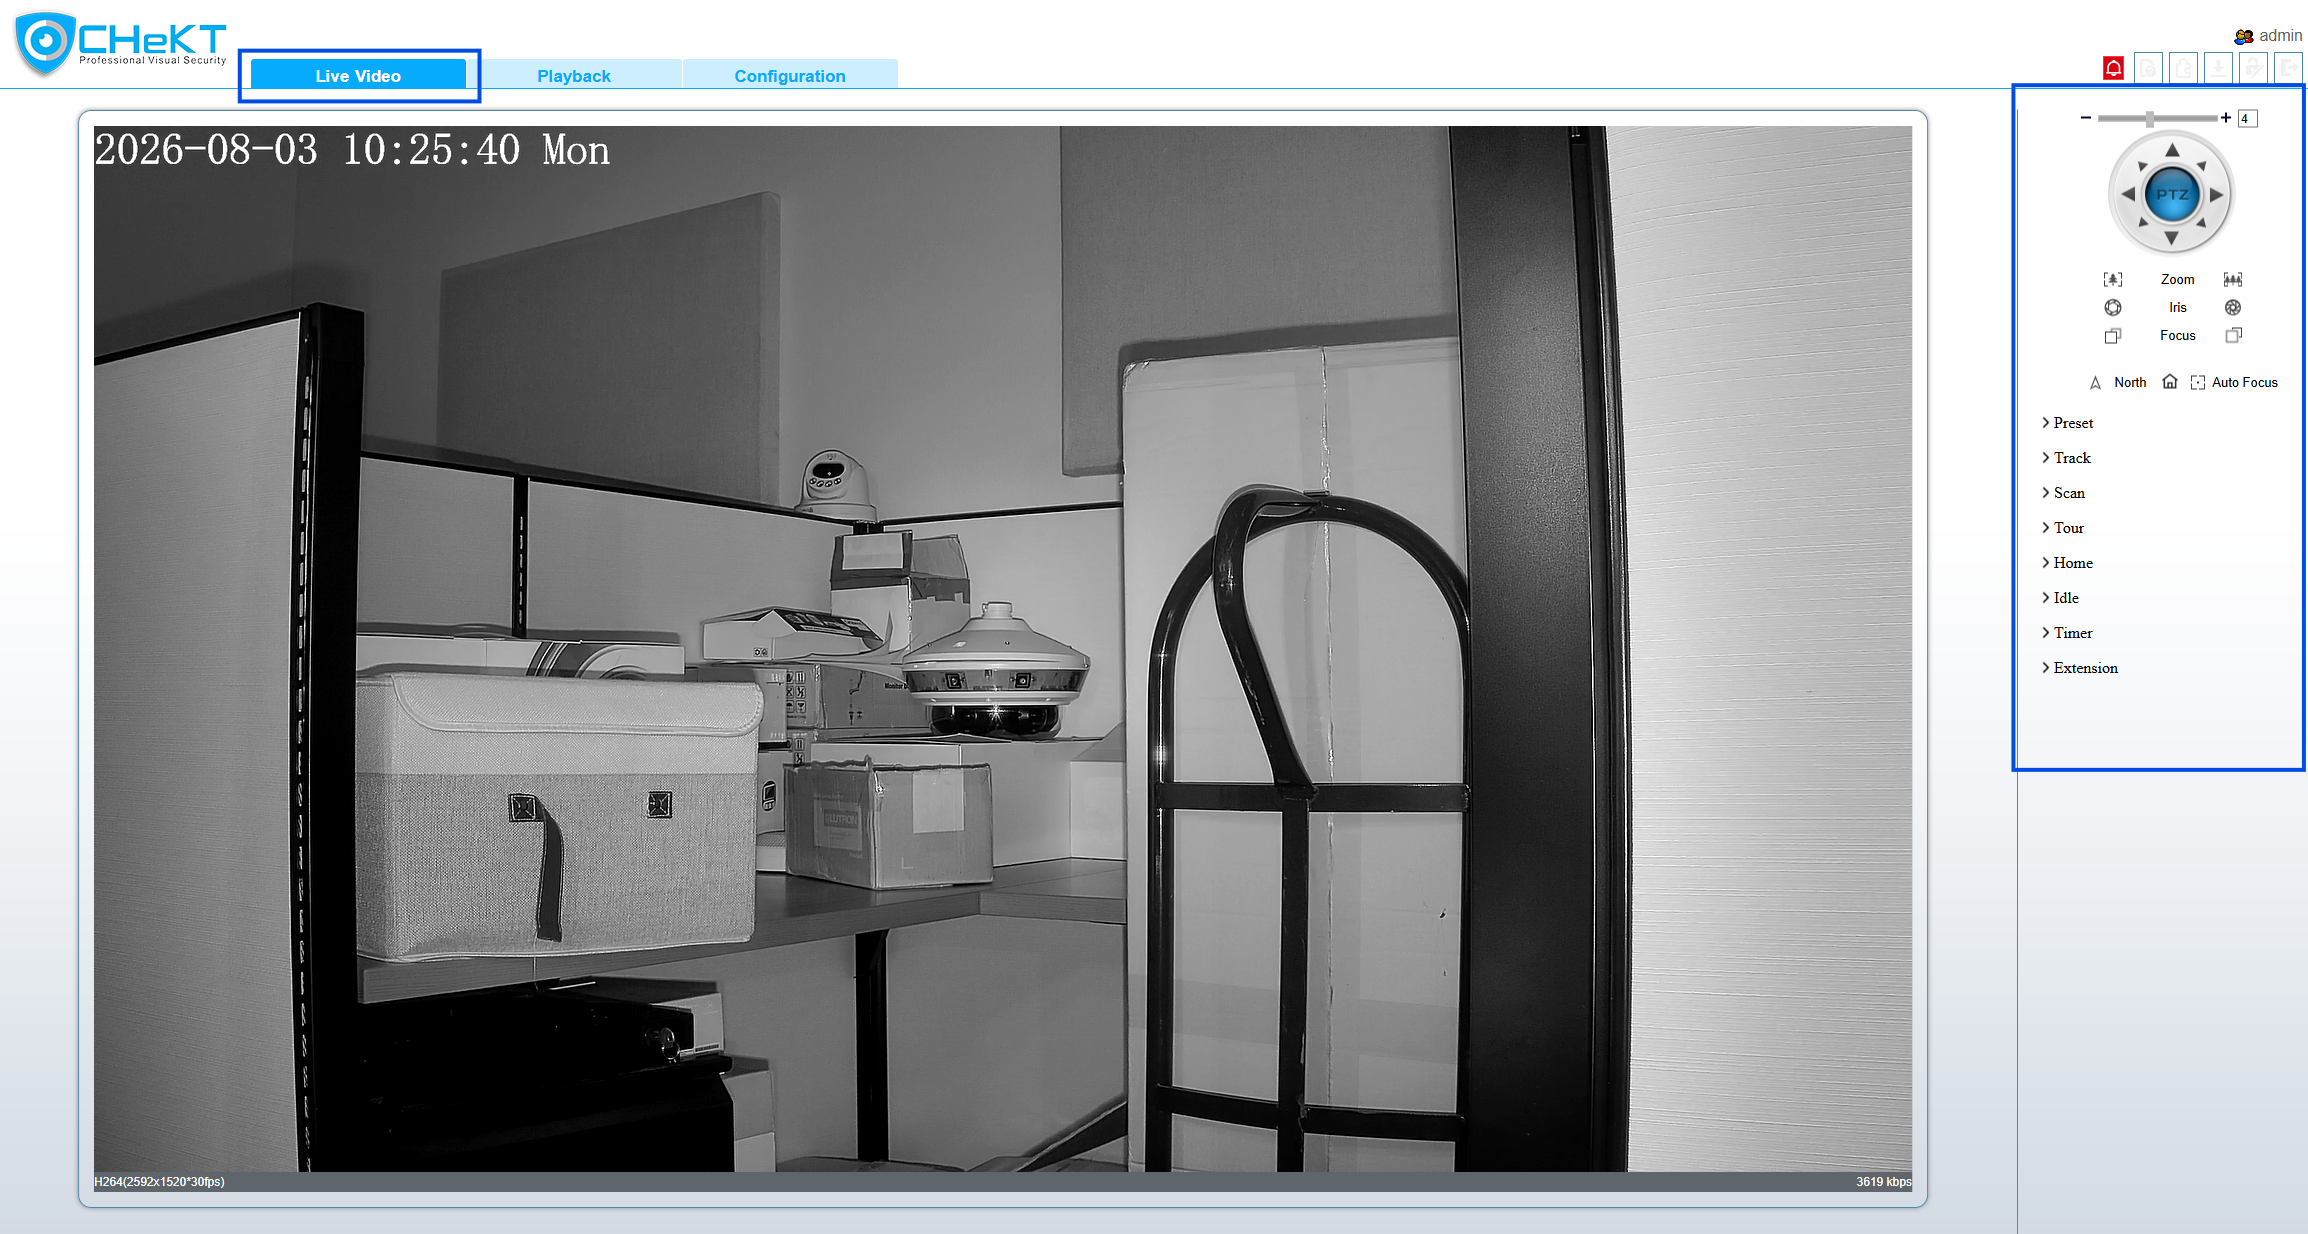
Preset
A Preset is a saved camera position.
When you save a preset, the camera remembers:
- Pan position (left/right)
- Tilt position (up/down)
- Zoom level
- Sometimes focus settings as well
For example:
- Preset 1 = Front Door
- Preset 2 = Parking Lot
- Preset 3 = Loading Dock
When Preset 2 is called, the camera immediately moves to the exact saved position. Presets are the building blocks for many other PTZ functions.
- Use the PTZ control to put the camera view where you want your Preset.
- Select the dropdown for the Presets
- Select the Save Disk to save Preset
- Click on the preset name to edit and rename it
Track
- Pan speed
- Tilt speed
- Zoom changes
- Direction changes
- Pause times
- Slowly pan across a fence line
- Zoom in on a gate
- Pause for five seconds
- Continue to a parking lot
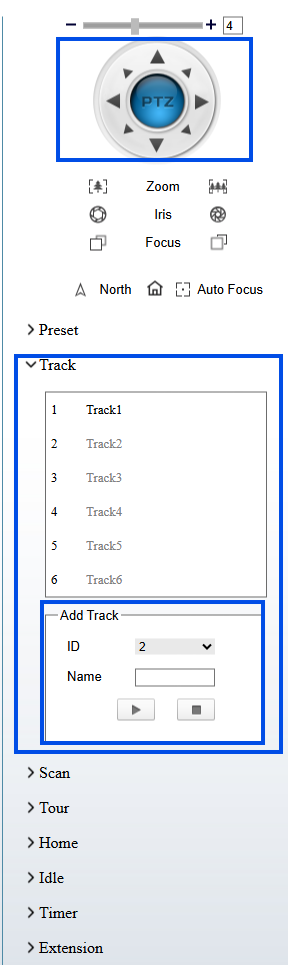
- Start with the camera view you want for the starting position
- Select the dropdown for Tracks
- Under the "Add Track" tab, select the ID you want or Name it and then select the play button to start.
- Control the PTZ to create the movements you want it to follow.
- Once you are done with the movements, select the stop button.
Scan
Scan
- Long fences
- Hallways
- Perimeters
- Roadways
- Start with the view you want for the starting position
- Select the Scan Dropdown
- In the "Add Scan" tab, select the open ID or name it and then select the play button
- Move the PTZ camera view where you want the end of the scan to be completed
- Select a hold time (between 0-255 seconds) for the PTZ to hold its position before starting the scan again
Tour
A Tour is an automatic sequence of presets.
Instead of staying at one location, the camera moves through several preset positions in order.
Example:
- Front Door (10 seconds)
- Parking Lot (15 seconds)
- Side Gate (10 seconds)
- Rear Entrance (20 seconds)
Then it repeats.
Tours are commonly used when one PTZ camera needs to monitor several important areas automatically.
- Start with the camera view you want for the starting position
- Select the dropdown for Tracks
- Under the "Add Tour" tab, select the ID you want or Name it and then select the speed you want to the PTZ to move at
- Select the Preset you want to start with
- Select the wait time for how long the PTZ waits between tours
- Select the play button
- Control the PTZ to create the track you want it to follow
- Once you are done with the tour, select the stop button
Home
- Select the Home Dropdown
- Click the Check Mark to save the Home location
- Select the circle arrow to reset home button to default (Default Position is straight down)
Idle
Idle defines what the PTZ camera should do after no one has controlled it for a specified amount of time.
For example:
After 60 seconds of inactivity:
- Return to Home Preset
- Start a Tour
- Begin a Scan
- Begin a Track
This ensures the camera doesn't remain pointed wherever an operator last left it. Many systems use Idle mode to automatically return the camera to its normal monitoring behavior after manual control ends.
- Select the Idle Dropdown
- Enable or Disable
- Select which PTZ type you want to use (preset, track, scan, tour)
- Select the name for the type function
- Select a wait time ( 1-240 minutes) this is how long the PTZ waits before going into the Idle Mode
- Select the Check mark to save
Timer
- Choose a begin time and an end time
- Select the PTZ type you want to use (preset, track, scan, tour)
Extension
- - The brush icon triggers the Wipers to clean the camera
- - The Window fog icon allows you to defog the camera with a built in heater
- - Gives you the option to reboot the actions
Thank you for reading!