CHeKT Bridge Network Tab Guide
Portal Users can access direct network configuration settings for the CHeKT Bridge/VCP directly from the dealer interface via Site Details > Devices
Click on the Bridge Settings:
Click on the "Network" Tab:
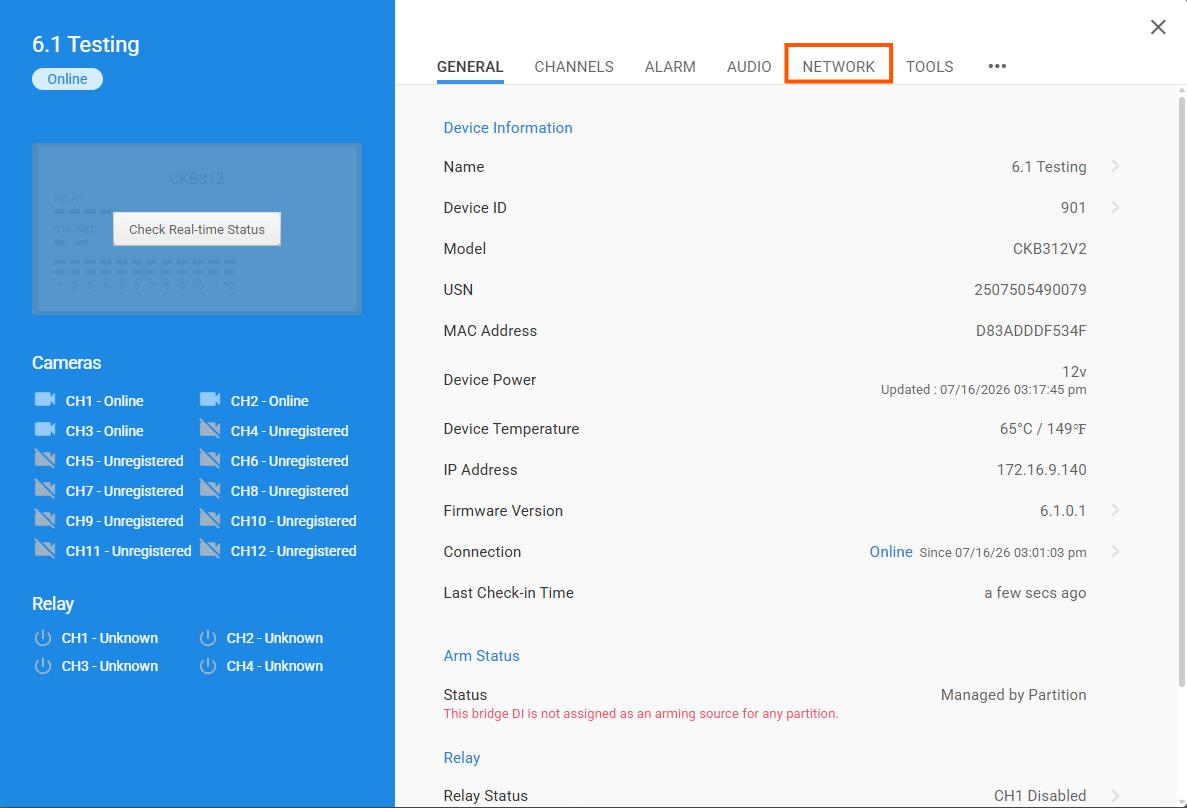
And you will arrive at the Network Configuration Screen:
Main IP:
On this line is the current IP address and assignment method (Static IP or DHCP). You can click the line to enter Main IP Config :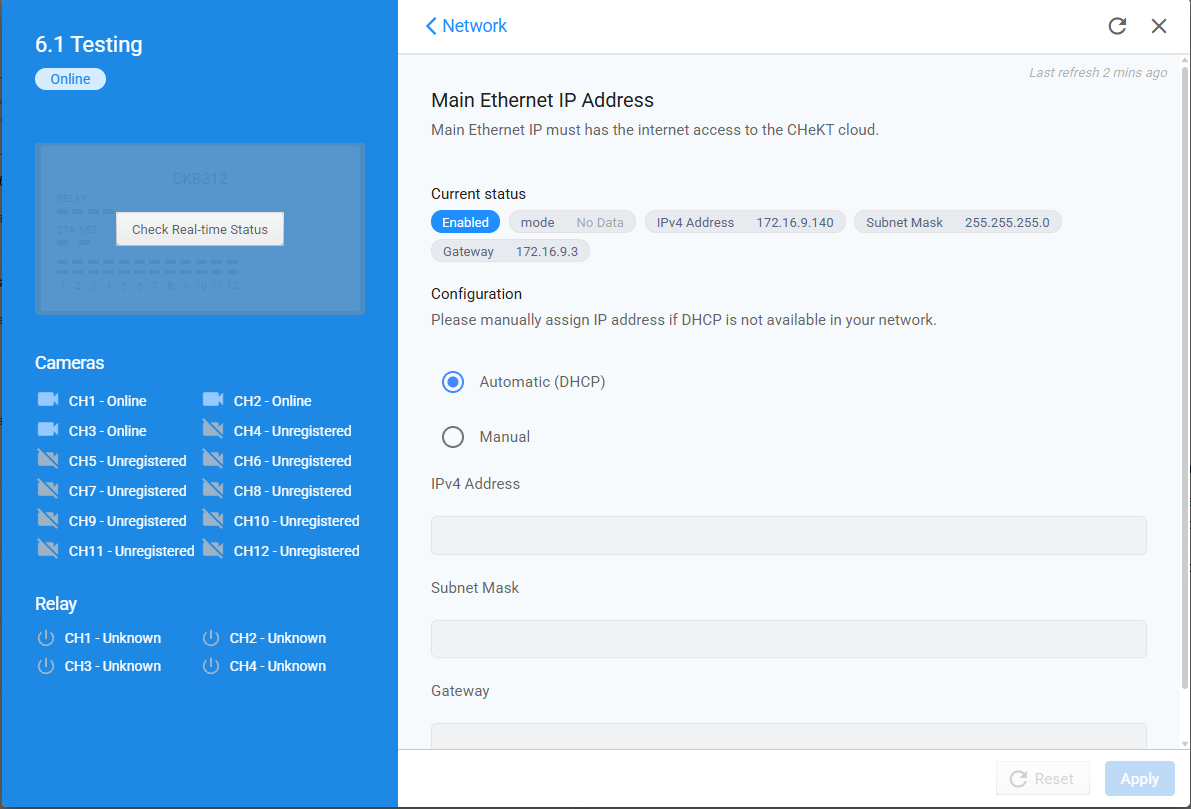
- On this screen, you can see more detailed IP information including the Subnet Mask and Gateway at a glance on Line 1
- You can also manually assign a static IP by clicking manual and entering the desired IP information in the boxes below.
Sub IP:
This function allows the user to add an additional IP address to the bridge in a different IP range; click to configure:
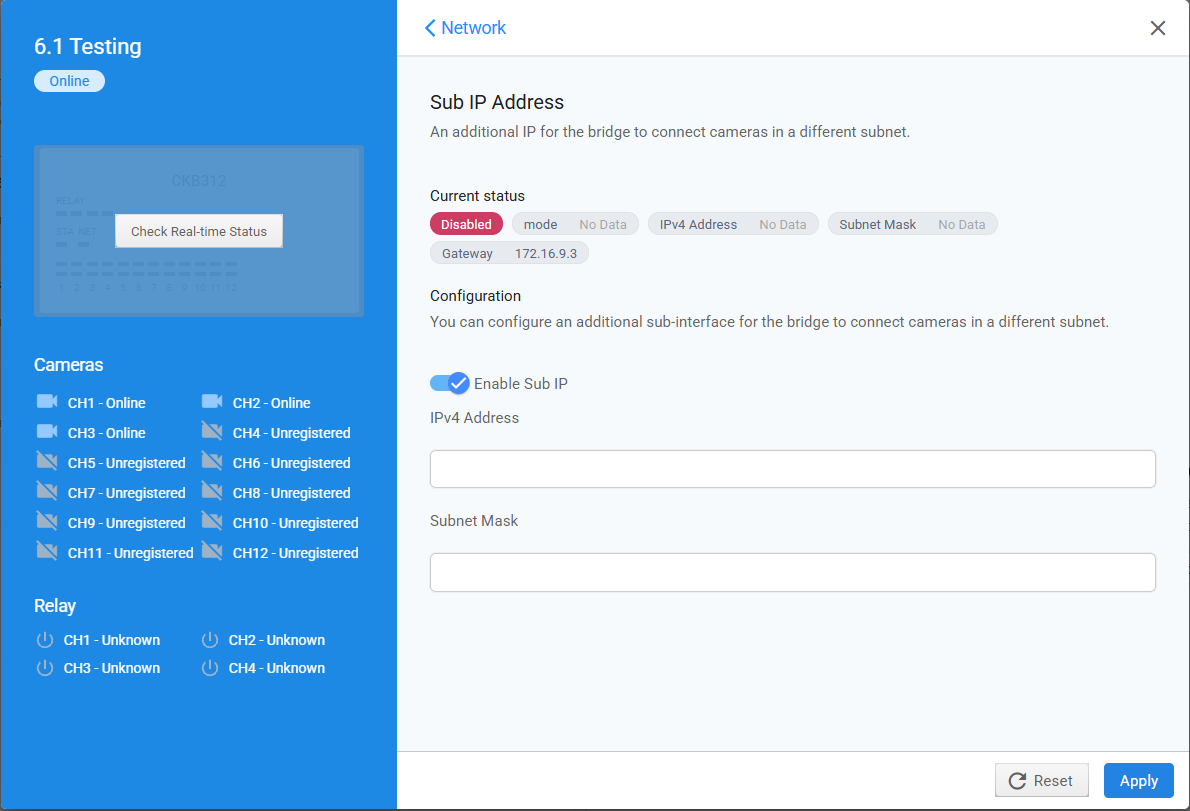
- Click the enable slider to activate the function (the IPV4 Address and Subnet Fields will go from grey to white)
- Enter desired second IP Address
- Enter Subnet Mask for the added network.
- Click "apply"
3. Emergency IP: If working with a network that doesn't use DHCP assignment for IP addresses, the bridge will default to the displayed local IP address for direct configuration, click to view:
- With DHCP and Portal Communications unavailable, this function will go active
- Navigate to the listed IP locally to configure network settings and assign the Bridge an internet capable IP address.
DNS Settings:
View or add DNS Address information; click to configure:
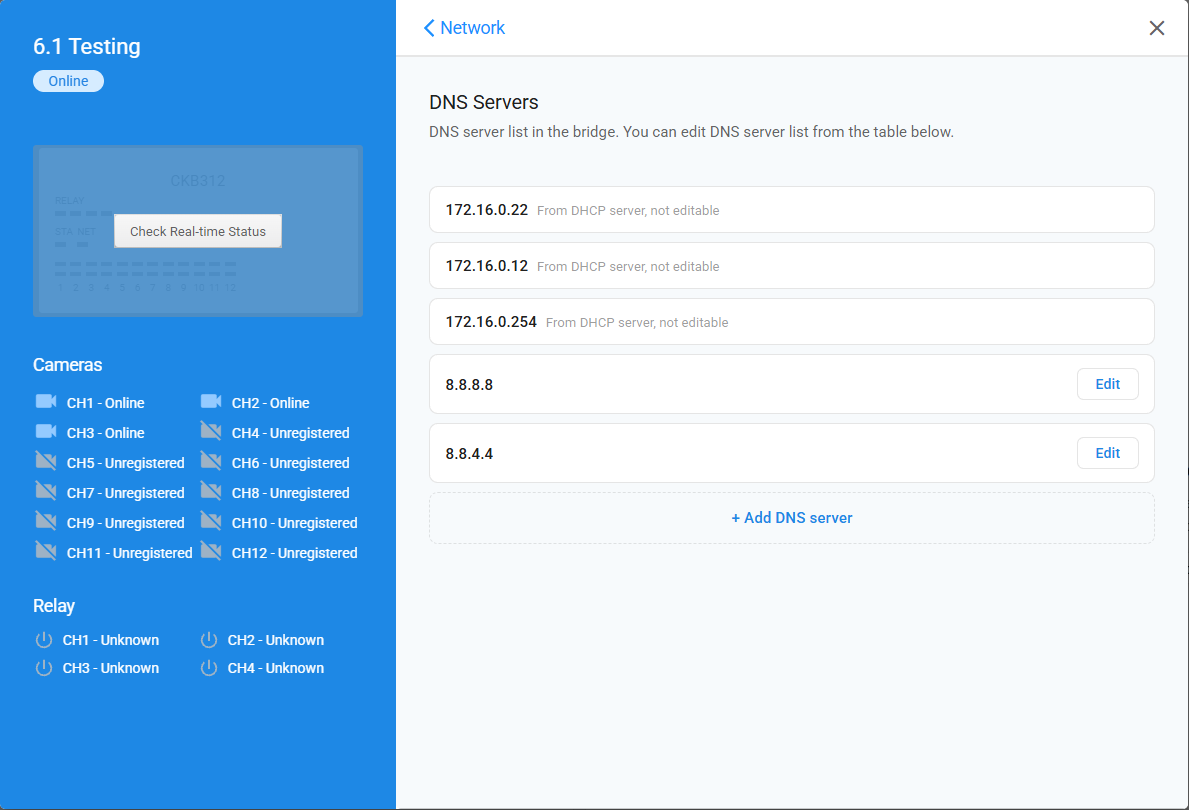
- The DNS server your network is communicating is displayed on line 1 and cannot be edited
- Click add or edit to manage the custom list of selected DNS server locations
Admin Tool:
This will provide you with the information to access the full local administrative configuration of the Bridge through the LAN, click to view:
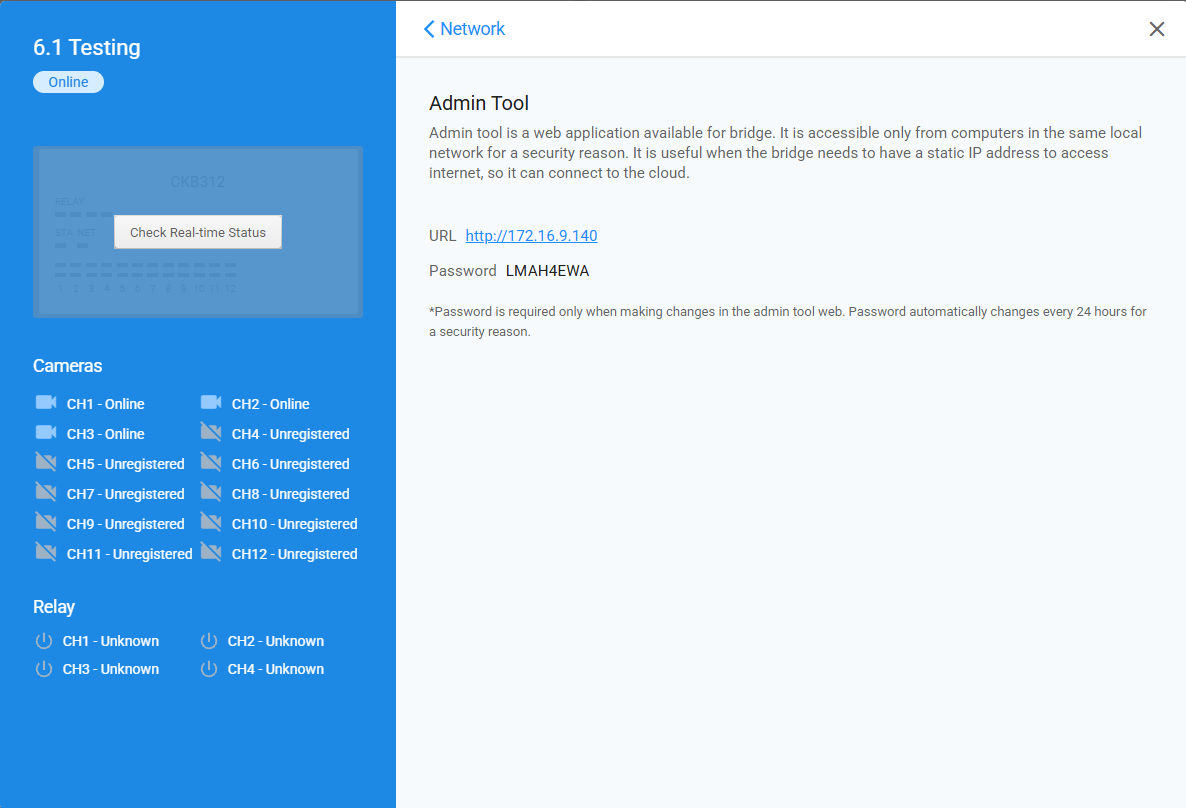
- The URL that the user can navigate to for Local Admin Configuration is listed here
- That password will change daily; log into the dealer portal to get today's custom password to access the configuration.
- *Note* This is not required for standard bridge installation and mostly designed for more granular troubleshooting.
Local Admin Interface Navigation article coming soon.
Thanks for reading!
Related Articles
Cawamo-CHeKT Integration Guide
The Cawamo AI Server integrated with the CHeKT platform creates video AI event notifcaitons for alarm monitoring centers and customers using the CHeKT Mobile app. This integation allows sites to leverage Cawamo's advances AI as detection zones for ...CHeKT E-Series AI Camera Models
The E-Series AI camera boasts a robust construction, ensuring its ability to withstand various environmental conditions. When using the CHeKT Video Bridge, this camera takes advantage of modern IP technology to communicate alarm signals from the ...CHeKT IP Speaker Installation Guide
Configuring the CHEKT 30w IP Speaker/Horn: CKIPS30W The CHeKT IP Speaker has a factory Static IP Address of: 192.168.50.196 Factory Login Credentials are set as "admin" and "chekt" prior to configuration The speaker is a POE device. To use the full ...Adding an Axis IP Speaker - (Pre FW Verison 3.2)
This guide will outline how to connect the AXIS Network Speaker to a CHeKT Bridge using a firmware version less than 3.2.0 In Firmware 3.2.0 and higher the setup and connection process is simplified. Important Notes: The Audio Talk-Down service for ...Bridge Network Requirements for CHeKT
When troubleshooting the connectivity of a CHeKT Bridge it is important to understand a few details. 1. Connectivity Requirements: DHCP Enabled Network: The Bridge obtains an IP address using DHCP by default. The Bridge does support a static IP ...