OPTEX InSight Camera Overview
OPTEX InSight Cameras
 The Optex InSight series are the new members of the OPTEX sensor family of outdoor detection. By combining the dual-tech sensors of an OPTEX sensor and a full HD 1080 camera, you now have a powerful Visual Verification PIR camera, powered by CHeKT. This highly reliable device is DHCP enabled making it ready to plug in and play with your CHeKT bridge to provide a highly detection performance. If you need to configure the IP address to static proceed to the IP Address Configuration Chapter after powering up, otherwise please follow the first two chapters to get your device started and setup.
Installation
1. Remove the mounting plate
2. Install the monting plate using 2 screws
3. Connect cables to device
4. Secure the main body
The Installation Quick Guide PDF is available at the bottom of this article
Mounting to CHeKT Bridge via Dealer Portal
1. Select the Customer Account Site in your dealer portal and navigate to Site Devices>Devices
2. Click on the Add Button drop down menu at the top corner
3. Click to select Add Camera.
4. Select Channel:
Select the Bridge you desire to mount the camera to from the drop menu > Select an available camera channel from the bridge list
5. Add Video Device: Locate and click to select the InSight Camera from the discovered devices
6. Authentication: Type in the default username and password of the InSight camera (root/OPTEX)
Notice Alert Note!
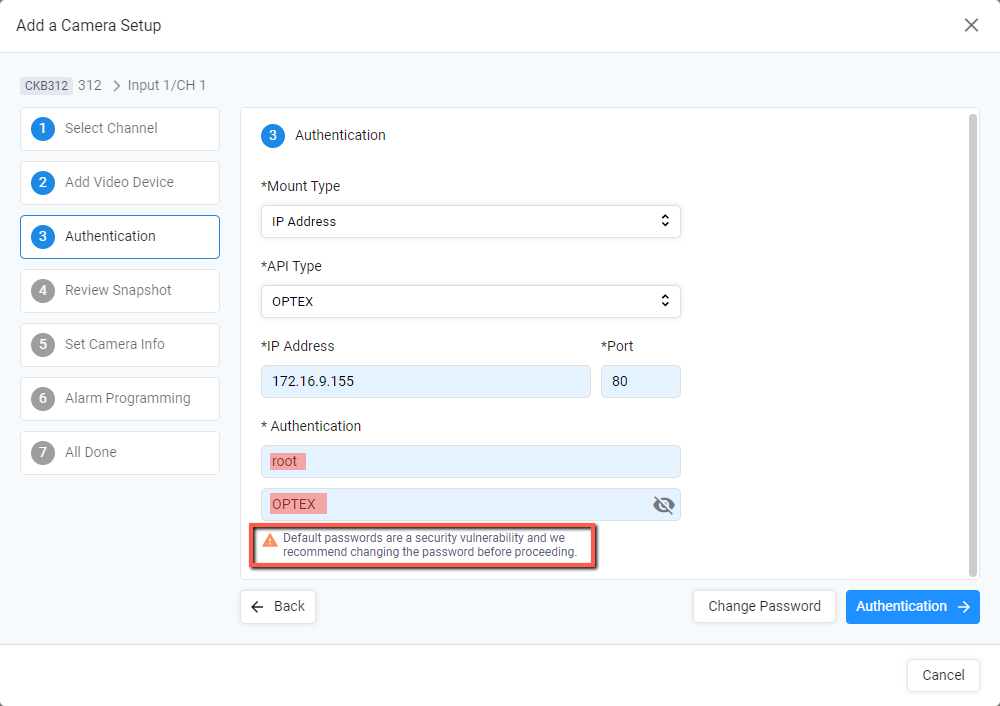

Alert Note:
Default passwords are a security vulnerability and we recommend changing the password before proceeding
6-A. Change Password Alert : Click on the change password button> read alert note > click on change password button to proceed to the next step.
6-B. Change Password: On the following window, you can create a password of your choice or have our portal generate a new password for you. Once created, click on Change Password.
6-C. Athenticate: Type in your new password and click authenticate.
7. Review Snapshot: You may add an Alarm Detection Overlay in this step, otherwise proceed to the next step.
8. Set Camera Info: Name the camera accordingly and set a sensor zone number if needed, once configured click Next.
9. Alarm Programming: In this page you will configure how this new mounted camera/zone will behave and communicate to the central station. The alarm trigger source should default to Onvif/Analytic Event Trigger for InSight Cameras. Once configured click Next to the final Step.
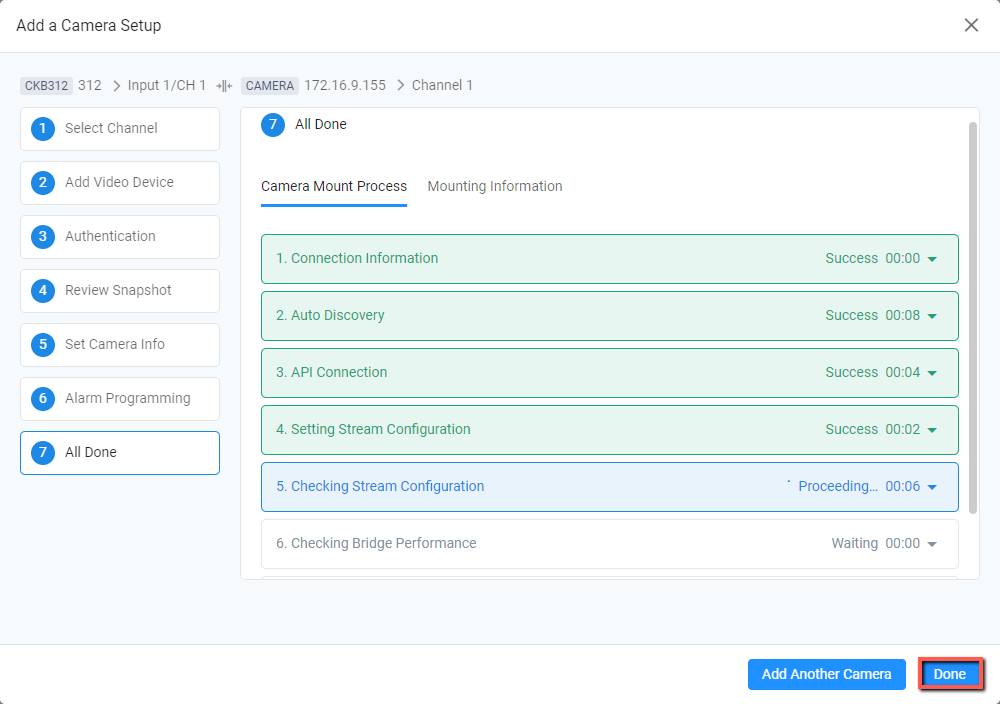
10. All Done: In this final step, t
he portal will began the 7 step mounting process, from here you may proceed to Add Another Camera or click Done to close the mounting window. The process will continue and complete in the background.
IP Address Configuration
The InSight Cameras are DCHP enabled as mentioned above, if you need to change them into a static IP address, please follow either of the following two methods.
Method 1: Direct Connection to the Camera
1. Connect the IP camera and pc to the configured network.
2. Find the ip address of the camera and type it in your browser address bar to access the camera's web page
3. Default ID/ Password to access the IP camera are root/OPTE
4. Click on the Change Password button to change your password, apply the new password, click change password in the pop up window and proceed to the next step
5. Click Setup
6. On the menu on the left, click Network > Network settings
7. Input the assigning Static IP address Information
8. Click Apply and Close window.
Method 2: IP Installer Software
0. Download the
IP Installer and run it.
1. Click to select the network in which the camera is connected to and click the search button below.
2. Click to select the camera from the discovered list.
3. Select Static
4. Input the Static IP address information as necessary
5. Change the Port information as neccessary
6. Input ID and PW (if not previously changed: root/OPTEX) for authentication
7. Click Save
8. Reboot
Related Articles
Add Bulk Cameras: Bulk Camera Mounting
Add Bulk Cameras via the CHeKT Dealer Portal Overview The Bulk Add Camera feature in the CHEKT Dealer Portal allows dealers to efficiently add multiple cameras to a customer site simultaneously, regardless of whether the cameras share default ...Analytic Triggers: Using Camera Analytics
Analytic Events Supported analytic event triggers from a camera mounted to the bridge can generate alarm signals and video events. These events are based on a supported API connection with the camera. The network event message has topic information ...Adding Cameras to a CHeKT Bridge
Links to Additional Steps Creating A Site: Creating a New Customer Site Site Arming Method: Setting Site Arming Source Registering a Bridge: Registering a CHeKT Bridge Alarm Panel Wiring: Alarm Panel Pairing: Programming an Alarm Panel with The ...CHeKT AI Cameras Analytics Manual
The latest licenced plug-in is a set of analytical tools loaded on our cameras that provides the means to perform advanced analytics, reduce false alerts and customize when events occur. This article will describe how to enable and configure the ...Deleting a Camera in CHeKT Support
Removing a Camera When completely removing an IP camera, the user will lose access to the video and snapshot events and the configurations from that device! Click on the "Customers" tab in your Dealer Dashboard Menu. Click on the desired "Site" where ...