Hanwha Cameras In CHeKT : Quick Start Setup Guide
Part One: Configuring IVA Analytics on the Hanwha Camera
- Open a web browser and navigate to the camera's local IP address or utilize the CHeKT Remote Access Utility form the Dealer Portal and open a connection to that camera.
- Log in using your administrator credentials to access the camera's web interface.
- Once logged in to the camera interface, locate and click the Gear icon to open the camera's settings menu.
- In the left-hand navigation menu, locate and click on Analytics to expand the submenu.
- From the expanded options, select IVA:
- In the expanded configuration menu, verify IVA is enabled and the correct channel is selected
- Select the Analytic Rule or Rules that applies to your specific use case. Before saving, verify the following settings are properly configured:
- The rule is Enabled
- The Detection Area has been drawn on the camera's field of view
- Any required sensitivity settings have been adjusted appropriately
- Apply your changes.

For our example scenario, we created 2 rules with different targets. The Rule on the left hand side of the screen is designed to detect vehicles and not humans. The Rule on the top right of the screen is looking for people, and and excluding vehicles.
Part Two: Enrolling the Camera in the CHeKT Portal
Hanwha Cameras will enroll in the
CHeKT Portal following the standard Camera Enrollment Process.
1. Select the configured camera from the device list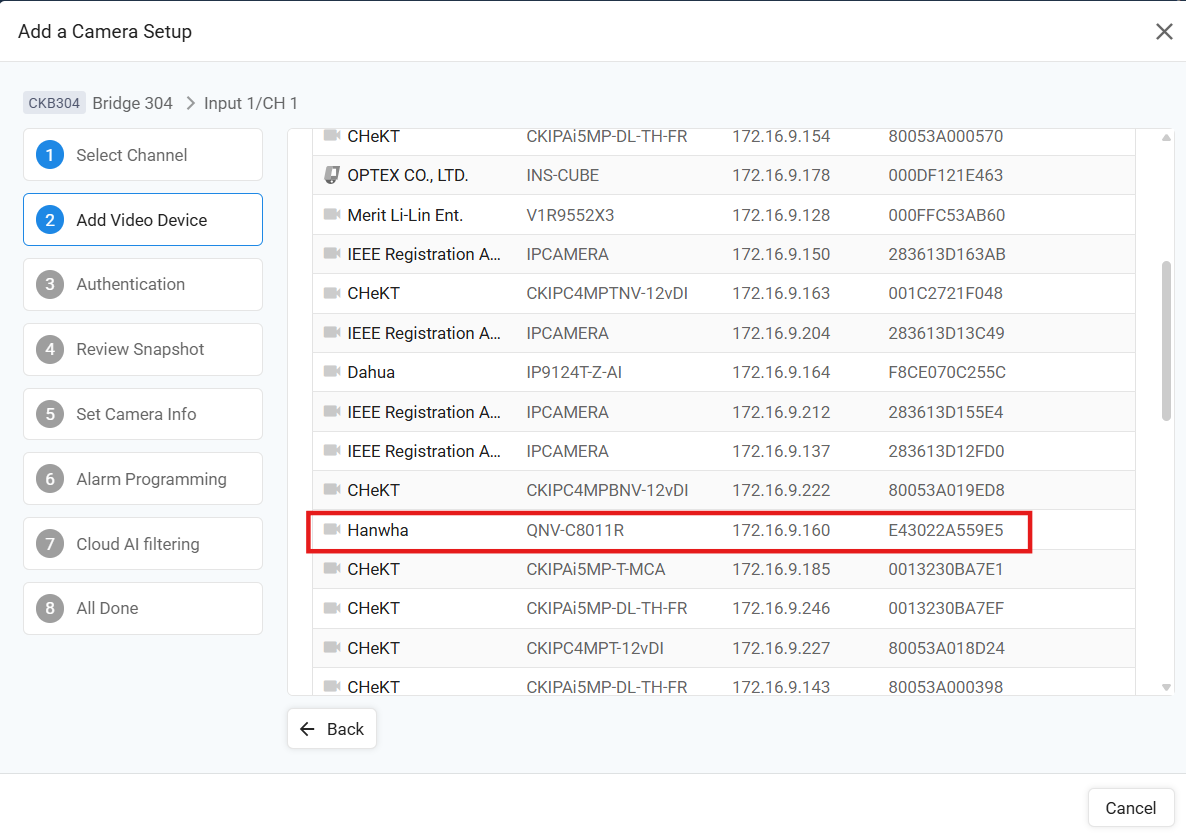
- Enter the correct credentials for the configured camera and authenticate.
For Multi-Lens Cameras, a channel
list presenting all available lenses will open after authentication.
- Using the CHeKT Image Preview, ensure that the stream configured for detection is selected for mounting.
 Take care
to select the proper stream. In some cases, the channel numbers may not be an
exact match
Take care
to select the proper stream. In some cases, the channel numbers may not be an
exact match- Complete the camera mount, including drawing the Cloud AI Area to match the Detection Zone defined in the camera analytics.

When the Camera comes online in
the CHeKT Portal, the system is ready to test and tune.
Part Three: Testing and Tuning
The in-portal utility for viewing and selecting ONVIF
Analytic Metadata is the best place to start when tuning detection on a
system.
If not familiar, the location and purpose of that
tool is quickly described here
- Access the ONVIF Analytic Metadata tool for that camera under the Alarm tab.
- Navigate along the presented graph to view the delivered alarm data for each hour.

In the scenario example, 24 messages
received on that analytic over the course of one hour was higher than expected.
The following steps outline the tuning process used to address this.
- Return to the camera's local web UI to review tuning options. The Hanwha Local Web UI allows you to observe the detection area live — the area will illuminate red when an alarm is triggered.
- Alarm: (Borders red and bounding box around subject red)
- No Alarm: (No Red Borders, no red bounding box)
- Using the observed alarm frequency in the local UI and live testing, adjust the camera settings as needed.
For this scene, we discovered during our initial testing that most of the alarm traffic was coming from People on the ground zone to the left. The camera is designed to protect inventory, and the real worry is foot traffic upstairs, or unexpected vehicles in the drive way. Defining the targets for each zone with independent cloud AI zones improved the system accuracy.Tuning Considerations
Specific scenario testing is important. Keep the following
in mind when selecting and tuning analytic rules:
- If the system needs to alert any time a subject enters the detection area with no prerequisite action required, consider reducing the minimum duration to 1–2 seconds.
- If most of the activity is from a specific target type (like today), utilizing the target defining functions in the camera can be very effective.
- The Face Detection analytic may be a great fit for areas with very little human activity, while an Intrusion rule with a minimum time or loiter timer may be better suited for busy walkways.
- Selecting the proper analytic rule and tuning for the scene is critical to the accuracy of the installed system
Related Articles
Hanwha WAVE Server and CHeKT: Alarm Integration using Cloud API Calls
This article is a guide to creating alarm traffic in the CHeKT Utilizing a Hanwha WAVE VMS Server. If the Hanwha camera supports edge-based analytics and resides on the same local area network as a VCP, the method described in this quick-start guide ...CHeKT AI Cameras Analytics Manual
The latest licenced plug-in is a set of analytical tools loaded on our cameras that provides the means to perform advanced analytics, reduce false alerts and customize when events occur. This article will describe how to enable and configure the ...Adding Cameras to a CHeKT Bridge
Links to Additional Steps Creating A Site: Creating a New Customer Site Site Arming Method: Setting Site Arming Source Registering a Bridge: Registering a CHeKT Bridge Alarm Panel Wiring: Alarm Panel Pairing: Programming an Alarm Panel with The ...Cawamo-CHeKT Integration Guide
The Cawamo AI Server integrated with the CHeKT platform creates video AI event notifcaitons for alarm monitoring centers and customers using the CHeKT Mobile app. This integation allows sites to leverage Cawamo's advances AI as detection zones for ...CHeKT E-Series AI Camera Models
The E-Series AI camera boasts a robust construction, ensuring its ability to withstand various environmental conditions. When using the CHeKT Video Bridge, this camera takes advantage of modern IP technology to communicate alarm signals from the ...